← All Campaign Guides

Tacticus Saim-Hann Campaign Guide

Beat every Saim-Hann Normal and Elite stage with recommended Aeldari teams, investment targets, and replay-backed strategies.

Replay data updated:

Overview

Timing

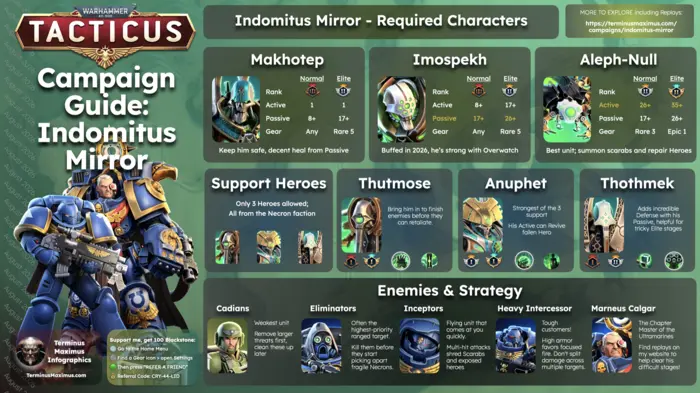
Normal is a manageable single-faction campaign, comparable to Indomitus Mirror or Octarius. Elite is widely recognized as the game’s hardest and most investment-heavy Elite campaign.

Saim-Hann Normal is a manageable early-to-mid account campaign; late Saim-Hann Elite is the real investment test. Progress Normal with modest Bronze-to-Silver ranks, open the farms you need, and avoid treating immediate Elite completion as mandatory.

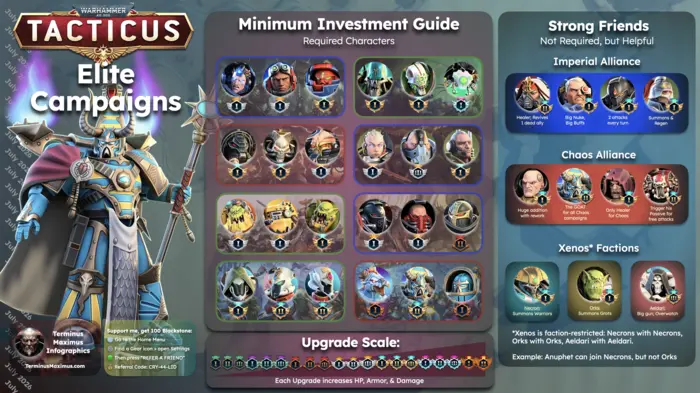
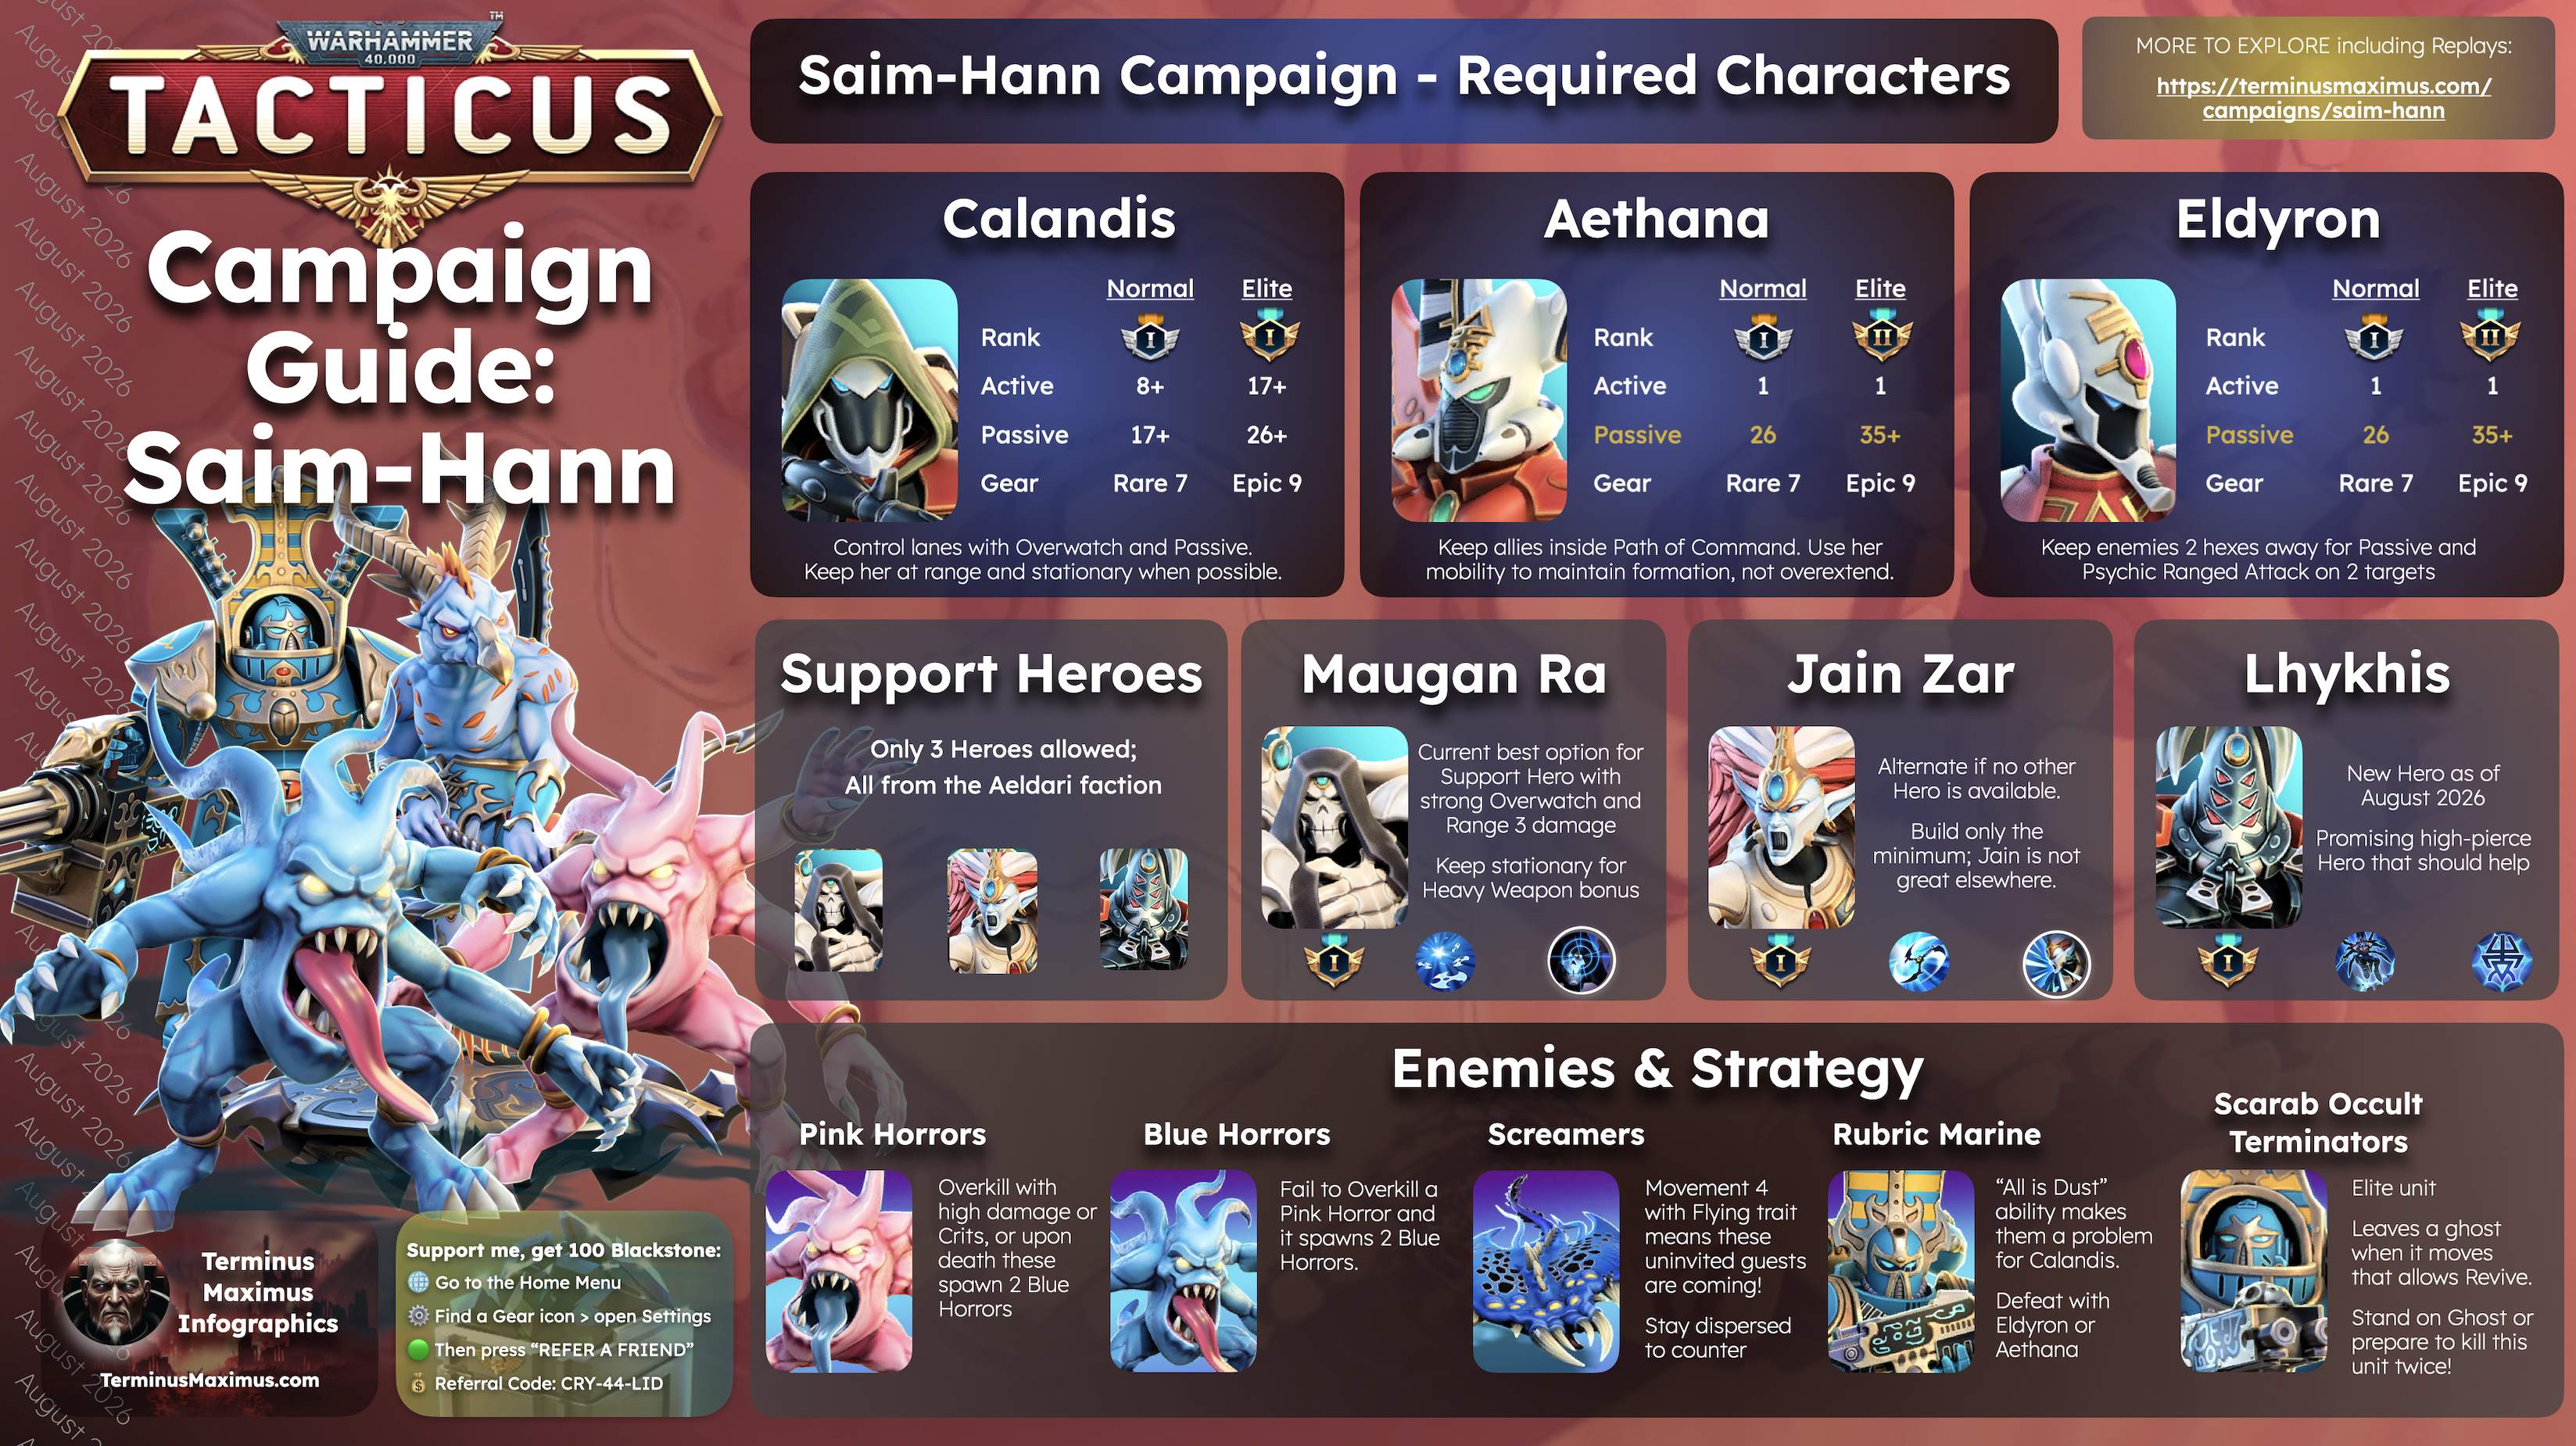
Elite repeatedly restricts deployment to Calandis, Aethana, and Eldryon. Supporting Aeldari help on open stages, but they cannot replace investment in the required trio through the final trio-only gate at Elite 36.

Push when the next Elite material or boss-shard node solves an account bottleneck. If the final chapter asks for upgrades that would produce more value elsewhere, farm the nodes already opened and return later.


Progression

Required Carry: Eldryon first, Aethana second, then only as much Calandis investment as progression and survival require.

Use Saim-Hann as an account-building route, with Eldryon receiving the highest-value long-term investment.

  1. Unlock Calandis, Aethana, and Eldryon and begin Normal.
  2. Raise the trio evenly enough to survive restricted stages, prioritizing Eldryon and Aethana when investment diverges.
  3. Complete Normal and return for missing medals when Elite becomes the next useful goal.
  4. Enter Elite with a maintained Silver core and collect valuable material and shard nodes.
  5. Use Elite 26, 29, and 36 to test the required trio without support.
  6. At Elite 36, target the practical G2 Eldryon, G2 Aethana, and G1 Calandis benchmark.
  7. Use Maugan Ra, Lhykhis, or Jain Zar only where deployment permits them.
  8. Push Elite 39–40 only when the rewards justify the additional investment.

Eldryon is the Required Carry in resource-efficiency terms. Psychic damage answers armored Rubric Marines, Doom amplifies the formation, and Eldryon remains valuable well beyond this campaign.

Recommended Investment targets are practical planning goals rather than record-low clears. Equipment, badge levels, positioning, critical hits, blocks, and enemy movement can move the true minimum substantially.

Recommended Investment

Normal Investment

HeroRankActivePassiveWeaponDefense
Calandis Tawaren Silver I rank Calandis active ability8+ Calandis passive ability17+ 7 7
Aethana Barantharal Silver I rank Aethana active ability1 Aethana passive ability26 7 1
Eldryon Ynaduin Silver I rank Eldy active ability1 Eldy passive ability26 7 1

Elite Investment

HeroRankActivePassiveWeaponDefense
Calandis Tawaren Gold I rank Calandis active ability17+ Calandis passive ability26+ 9 9
Aethana Barantharal Gold II rank Aethana active ability1 Aethana passive ability35+ 9 1
Eldryon Ynaduin Gold II rank Eldy active ability1 Eldy passive ability35+ 9 1

Strategy & Tips

Plan Around the Doom Ring

Choose the enemy that must die, place it exactly two hexes from Eldryon, then route the remaining attacks into that target. Doom positioning is especially valuable against Rubrics and Scarab Occult Terminators.

Prepare the Overwatch Lane

Let enemies cross open ground into Calandis rather than moving her every turn. A stationary Calandis gains Heavy Weapon damage and can protect the approach toward Eldryon or Aethana.

Match Damage to the Enemy

Use Eldryon’s Psychic and Aethana’s Piercing damage against Rubric Marines. Save Calandis for softer targets, exposed Guard, Pink Horrors, and enemies she can remove safely from range.

Do Not Line Up for Screamers

Screamers can dive through several heroes. Spread diagonally, cover likely landing hexes, and avoid placing the fragile required trio in one straight lane.

Control Revives and Splits

Occupy a Scarab Occult Terminator’s time-ghost hex before finishing it when possible. Overkill Pink Horrors to prevent Split, and avoid creating Blue Horrors beside a vulnerable hero during the enemy turn.

Separate Clears From Medals

A clear can accept a casualty; three medals cannot. Hide the weakest hero when necessary, open the next node first, and return after rank or equipment upgrades make survival repeatable.

Required Heroes

Calandis, Aethana, and Eldryon are required throughout Saim-Hann. Rank and equipment targets come directly from the campaign recommendation data; no exact ability levels were supplied, so those fields remain unprescribed.

Calandis Tawaren portrait

Calandis

Role: Range-three sniper, Overwatch lane control, and mobile survivor.

Build Calandis to control lanes and survive; do not force her into the anti-armor carry role.

Rank
Normal Silver I rank Elite Gold I rank
Active
Normal8+ Elite17+
Passive
Normal17+ Elite26+
Weapon
Normal 7 Elite 9
Defense
Normal 7 Elite 9

Calandis controls open lanes with range-three Overwatch and Heavy Weapon damage. Let enemies approach whenever possible; constant movement gives up part of the stationary damage that makes her effective.

Fire and Reposition is best when the extra movement prevents retaliation or preserves a medal. Wireweave Net punishes the first normal melee attacker, but neither ability should become a badge sink solely for this campaign.

Her Energy attack is inefficient into Rubric Marines because of All is Dust. Aim Calandis at softer targets and let Eldryon or Aethana handle armor. Current late-Elite evidence supports keeping Calandis below the other two required heroes when resources are tight.

Aethana Barantharal portrait

Aethana

Role: Mobile flanker, formation support, and critical-hit amplifier.

Use movement to preserve the formation, not to overextend beyond it.

Rank
Normal Silver I rank Elite Gold II rank
Active
Normal1 Elite1
Passive
Normal26 Elite35+
Weapon
Normal 7 Elite 9
Defense
Normal 1 Elite 1

Aethana’s movement, Flying, and Deep Strike solve awkward terrain and deployment, while Path of Command strengthens nearby allies. Keep the aura relevant without making Aethana the closest exposed target.

Prioritize Path of Command before Swooping Hawk. The aura improves the formation every turn; the active is most valuable for alignment, reaching a protected enemy, or cleaning up several weakened targets.

Late Elite turns Aethana’s survival into a real constraint. Her mobility should preserve formation and escape routes rather than invite an unsupported charge into the enemy line.

Supporting Heroes

Only three Supporting Heroes are currently relevant. They are shown directly in recommendation order: Maugan Ra is the proven best option, Lhykhis is the new but unproven candidate, and Jain Zar is the last-resort control choice.

Lhykhis portrait

New — Lhykhis

Role: New mobile, high-pierce support with promising but unproven campaign value.

New: mechanically promising, but very few players have tried her in Saim-Hann yet.

Lhykhis is now available through Crusade Shop. Her movement, multi-hit eligibility, and Molecular damage appear well matched to Saim-Hann’s armored and mobile enemies.

Campaign evidence is still too new to show that she lowers reliable minimum ranks or displaces Maugan Ra. She may become excellent on unrestricted Elite stages, but she cannot change the required-trio floor at Elite 36 and earlier gates.

Jain Zar portrait

Last Resort — Jain Zar

Role: Mobile defensive disruption, Infiltrate, and Screamer control.

Last Resort: useful control when already built, but not an efficient campaign-specific project.

Jain Zar offers defensive utility rather than Maugan Ra’s ranged deletion. Infiltrate crosses Overwatch safely, while Terror’s Lament reduces adjacent enemy damage and melee hit count; players specifically value that control against Screamer dives.

Like Maugan Ra, she is a Legendary support who cannot enter trio-only stages. Use an already-developed Jain Zar when control and survival matter more than raw damage, but do not acquire her for Saim-Hann alone.

Difficult Stages

The stages below generated the strongest concentration of community help requests, difficult replay searches, and “final missing medal” complaints. Difficulty is not determined by rank alone—deployment, equipment, target priority, and enemy behavior can be just as important.

Normal
75

Normal 75 — Ahriman

Why players struggle

The Normal finale allows the full Aeldari roster, but Ahriman and the surrounding Thousand Sons still turn a straightforward clear into a required-hero survival test.

Strategy

  • Use the best Aeldari already owned; do not chase a Legendary support for Normal.
  • Set Calandis’s Overwatch lane before moving Aethana or Eldryon into the threat zone.
  • Use Eldryon’s Doom ring and Psychic damage to focus armored targets efficiently.
  • Protect the weakest required hero once the decisive threats are removed.

Closing note

Bronze-to-Silver investment should be treated as a planning range, not a universal minimum. Positioning and equipment can matter as much as one additional promotion.

Elite
18

Elite 18 — Required Trio, Imperial Matchup

Why players struggle

Elite 18 removes supporting heroes and changes the usual Thousand Sons armor puzzle to an Imperial enemy set.

Strategy

  • Use Calandis’s range more aggressively against the less armor-focused targets.
  • Keep Aethana and Eldryon behind the opening firing lane.
  • Treat the stage as an independent test of the required trio’s survival.

Closing note

A support-led roster can hide a weak required hero elsewhere; this stage cannot.

26

Elite 26 — Chapter Four Trio Gate

Why players struggle

Elite 26 is one of the late required-trio checks where optional Aeldari cannot compensate for a fragile core.
Strategy

  • Plan the opening around Doom and a stationary Calandis lane.
  • Use Aethana’s mobility to maintain aura coverage without becoming the nearest target.
  • Move the best defensive equipment onto whichever required hero dies first.

Closing note

If success requires repeated favorable movement, build toward the recommended core rather than relying on an outlier clear.

29

Elite 29 — Final-Chapter Preparation

Why players struggle

Elite 29 repeats the trio-only restriction and exposes whether the core is ready for the final campaign page.

Strategy

  • Focus one Doom-marked threat instead of leaving several enemies damaged.
  • Avoid lining up the trio for Screamer movement and area pressure.
  • Preserve escape hexes for Aethana and Calandis during cleanup.

Closing note

Clearing 29 is a stronger readiness signal than success on an unrestricted stage with a powerful support.

36

Elite 36 — The Required-Core Benchmark

Why players struggle

Elite 36 is the final required-trio stage. No support can enter, so it establishes the true investment floor for Calandis, Aethana, and Eldryon.

Strategy

  • Use G2 Eldryon, G2 Aethana, and G1 Calandis as a practical current three-medal benchmark—not a guaranteed minimum.
  • Build the Doom turn first and protect the lowest-rank hero from unnecessary retaliation.
  • Check equipment and ability priorities before adding another full character rank.

Closing note

Once Elite 36 is complete, decide separately whether the rewards in 37–40 justify more core investment or an already-owned support.

39

Elite 39 — Late-Elite Difficulty Spike

Why players struggle

Current players describe Elite 39 as a major step up even for rosters that three-medaled through 38. Five deployment slots return, but incoming pressure remains severe.

Strategy

  • Bring the strongest support already justified by the account; Maugan Ra is the proven offensive choice.
  • Use overlapping Doom, aura, and Overwatch coverage instead of splitting damage.
  • Do not assume a comfortable Elite 38 clear means the roster is ready.

Closing note

Replay evidence does not support one exact minimum. Invest only when this node or full completion solves a meaningful account goal.

40

Elite 40 — Ahriman

Why players struggle

The final boss allows five Aeldari, turning support quality and coordinated burst into the deciding factors after the trio-only campaign gates are finished.

Strategy

  • Set the Doom target and firing lanes before committing the mobile heroes.
  • Use Maugan Ra if already developed; use Jain Zar for control or Lhykhis cautiously if her current rank and performance justify the slot.
  • Preserve required-hero survival during cleanup rather than chasing marginal damage.

Closing note

Elite 40 is a full-roster problem. It should not be used to justify overbuilding Calandis, Aethana, or Eldryon before they have cleared Elite 36.

Bosses

The five Saim-Hann bosses appear at Normal Stages 15, 30, 45, 60, and 75. Their Elite chapter encounters occur at Stages 8, 16, 24, 32, and 40.

Sokar Toth portrait

Toth

Normal 15Elite 8

Toth introduces the campaign’s Thousand Sons durability and rewards focused damage over scattered attacks.

Build the Doom target first, keep Calandis on a useful firing lane, and avoid exposing Aethana merely to finish a low-priority enemy.

Arkarzar Abraxas portrait

Abraxas

Normal 30Elite 16

Abraxas increases pressure through summons and clustered threats. Remove the enemies with immediate access to Eldryon or Aethana before the board becomes crowded.

Save burst for the turn Abraxas becomes reachable, then focus him through Doom rather than spreading damage across the formation.

Yazaghor Ficklefate portrait

Yazaghor

Normal 45Elite 24

Yazaghor’s mobility punishes loose positioning and can open unexpected attack lines toward the fragile required heroes.

Use terrain and Calandis’s Overwatch to control the approach, then keep the formation compact enough for Aethana’s aura without creating a straight Screamer lane.

Kairatar Thaumachus portrait

Thaumachus

Normal 60Elite 32

Thaumachus turns protection and target order into the central problem. Do not waste the team’s best attacks into the wrong protected enemy.

Hold the Doom-focused burst until it can remove a decisive target, and use Aethana’s mobility to reach the correct angle without leaving her exposed.

Ahzek Ahriman portrait

Ahriman

Normal 75Elite 40

Ahriman is the full-roster finale. The open deployment slots make an already-developed support valuable, especially during the much harder Elite encounter.

Coordinate Doom, Path of Command, and the best ranged or control support available. Once the main threats fall, move damaged required heroes out of danger to protect the final medal.

Campaign Replay Filters

Stuck on a specific stage? Select the difficulty and stage number to compare team compositions, hero ranks, and successful strategies.

Every recommendation on this page is supported by campaign research, documented clears, or the Terminus Maximus Campaign Replay Library. Use the filters below to find successful Saim-Hann runs for any available Normal or Elite stage.

Compare teams carefully. A low-rank clear may depend on stronger equipment, a premium supporting hero, a heavily developed carry, favorable enemy movement, or exact turn-by-turn positioning. The most useful replay is not always the one with the lowest ranks—it is the one whose roster and investment most closely resemble your own.

More Filters

Campaign Replays

Normal 60 1 replay
Normal 62 1 replay
Normal 64 1 replay
Normal 68 1 replay
Normal 69 1 replay
Normal 70 1 replay
Normal 71 1 replay
Normal 73 1 replay
Normal 74 1 replay
Normal 75 3 replays
Elite 3 1 replay
Elite 4 1 replay
Elite 5 1 replay
Elite 7 1 replay
Elite 8 1 replay
Elite 11 2 replays Maugan Ra
Elite 12 1 replay Maugan Ra
Elite 13 2 replays Maugan Ra
Elite 14 2 replays Maugan Ra
Elite 15 2 replays Maugan Ra
Elite 16 1 replay Maugan Ra
Elite 17 1 replay Maugan Ra
Elite 18 1 replay
Elite 19 1 replay Maugan Ra
Elite 20 1 replay Maugan Ra
Elite 21 2 replays Maugan Ra
Elite 23 1 replay Maugan Ra
Elite 24 1 replay Maugan Ra
Elite 25 1 replay Maugan Ra
Elite 26 1 replay
Elite 27 1 replay Maugan Ra
Elite 28 1 replay
Elite 29 2 replays
Elite 30 2 replays Maugan Ra
Elite 31 1 replay Maugan Ra
Elite 34 1 replay Jain Zar
Elite 35 1 replay Jain Zar
Elite 36 1 replay
Elite 37 1 replay Jain Zar
Elite 39 1 replay Jain Zar
Elite 40 2 replays Jain Zar

Campaign Replay Statistics

These ranks change as you apply Filters

Calandis Tawaren portrait
Calandis Elite: 31 stages Normal: 10 stages
Max Rank
Diamond I rank badge
Diamond I
Aethana Barantharal portrait
Aethana Elite: 31 stages Normal: 10 stages
Max Rank
Gold II rank badge
Gold II
Eldryon Ynaduin portrait
Eldy Elite: 31 stages Normal: 10 stages
Max Rank
Diamond I rank badge
Diamond I
Maugan Ra portrait
Maugan Elite: 16 stages Normal: 0 stages
Max Rank
Silver III rank badge
Silver III
Jain Zar portrait
Jain Elite: 5 stages Normal: 0 stages
Max Rank
Gold I rank badge
Gold I

More to Explore